Intro
One of the most challenging and confusing topics, especially for beginners in Keycloak, is Client Scopes. In this article, I will break down this topic, explaining what Client Scopes are used for, how they work, and what their advantages are.
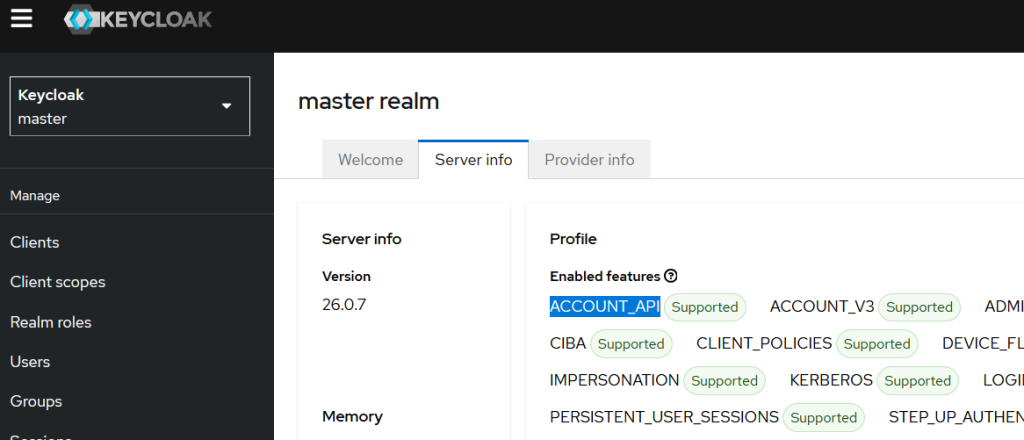
Let’s start! Our environment configuration is very simple. Typically, I work with containerized applications using Docker and Docker Compose, but today I decided to use Keycloak 26.0.7 running locally on my Windows 10 laptop. You can download Keycloak from the release page.
Here is the startup script:
set "JAVA_HOME=C:\jdks\temurin-17.0.6"
set KC_HTTP_RELATIVE_PATH=/auth
call kc.bat start-dev --db postgres --db-url-host=127.0.0.1 --db-url-database=keycloak --db-username=keycloak --db-password=keycloak
Before starting, you also need to download and install JDK and PostgreSQL locally. Alternatively, you can use Docker Compose to set them up – whichever option works best for you.
Keycloak client scopes and assigned types
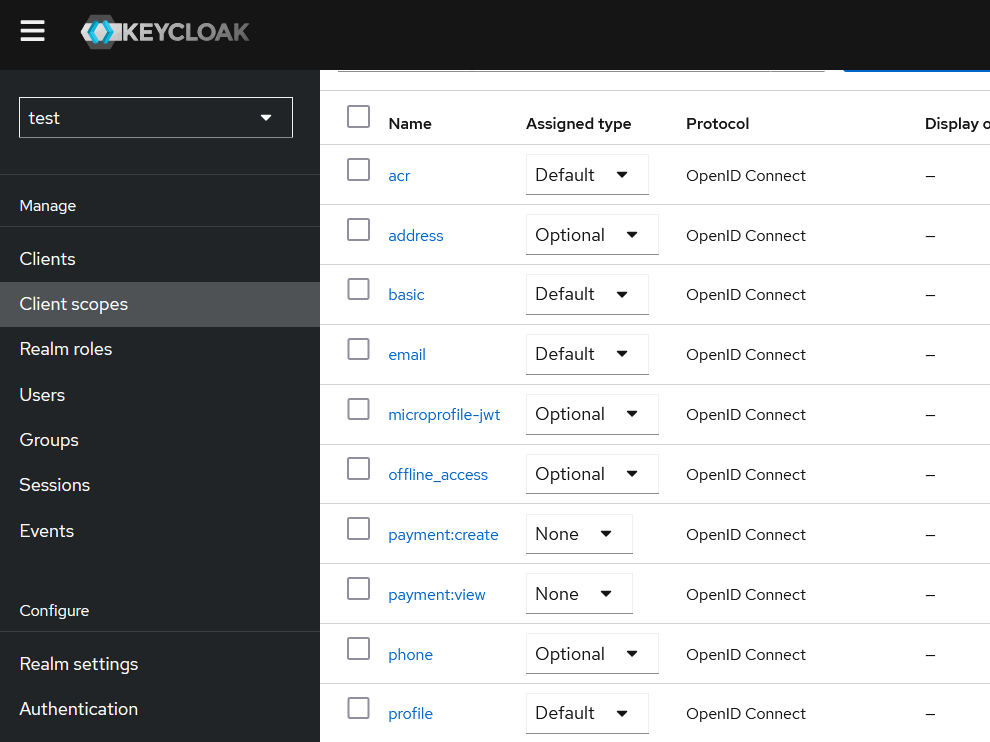
By default, when you click on “Client Scopes”, you will see a list of all the available client scopes provided out of the box, as shown below.

These Client Scopes are global, but you can also create OIDC client-specific Client Scopes, as we will see later.
Each of Client Scope has one of the following Assigned Types:
- None
- Default
- Optional
None: This assignment type means that the Client Scope will not be automatically attached to any OIDC client, whether existing or newly created. This is typically used for creating some particular configuration of mappers for the given clients, like specific oauth scopes available for concrete application related to this OIDC client.
Default: This type indicates that the Client Scope will work by default, even if it is not explicitly requested during authentication. And these scope are automatically propogated to all OIDC clients.
Optional: By default, this Client Scope does not work. Instead, the authentication code must explicitly request it in the scope parameter. We’ll explore examples of these types of requests later.
Now, let’s open one of the Client Scopes and examine what it consists of.

There are three blocks of configuration:
- Settings Tab
- Mappers
- Scope
Keep these parameters in mind – we will return to them later.
Configure Postman to use Authorization Code flow with Keycloak
Now, let’s create a new collection in Postman and configure it to work with the Authorization Code flow. This will allow us to authenticate using user credentials, gain a user context in the token, and experiment with features related to roles, OAuth scopes, and more.
1.
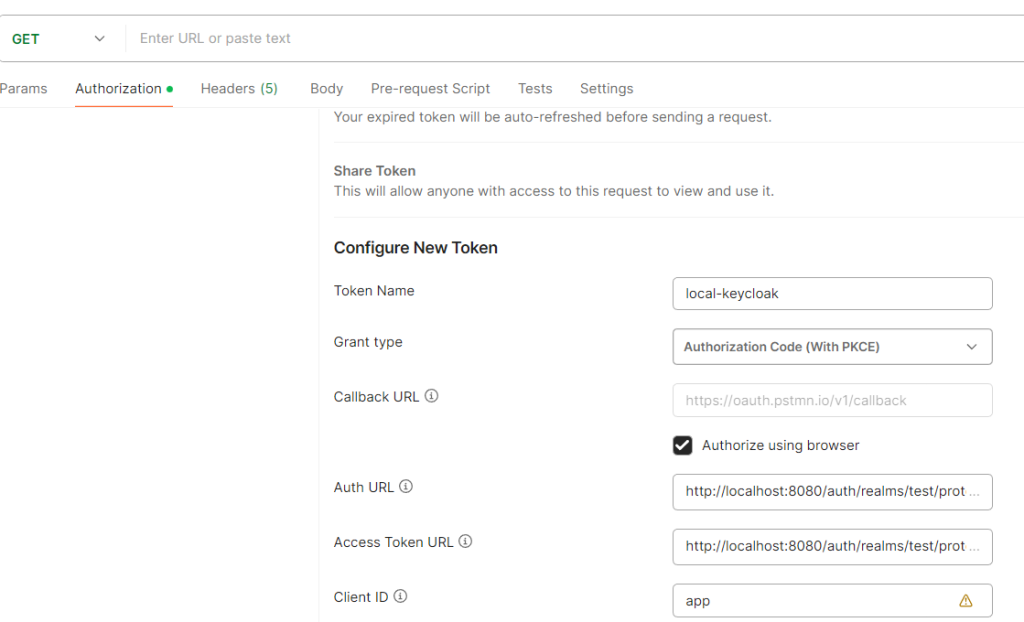
Create a new request in Postman. In the Authorization tab of the request (used for obtaining the token), select OAuth 2.0 as the type. For the grant type, choose Authorization Code (either with PKCE or without PKCE, it doesn’t matter in this case).
2.
Select the checkbox Authorize using browser to enable browser-based authorization.
3.
In Keycloak, navigate to Realm Settings > Endpoints > OpenID Endpoint Configuration and copy the following values:
- authorization_endpoint
- token_endpoint
In my case, these values are:
- Authorization Endpoint:
http://localhost:8080/auth/realms/test/protocol/openid-connect/auth - Token Endpoint:
http://localhost:8080/auth/realms/test/protocol/openid-connect/token
Paste these values into Postman’s Auth URL and Access Token URL fields, respectively.
4.
In Keycloak, create an OIDC client with the following configuration:
- Name:
app - Valid Redirect URIs:
https://oauth.pstmn.io/v1/callback - Authentication Flow: Standard Flow
Next, paste the name of the OIDC client (app) into Postman’s Client ID field.
Finally, your Postman configuration should look like this:
5
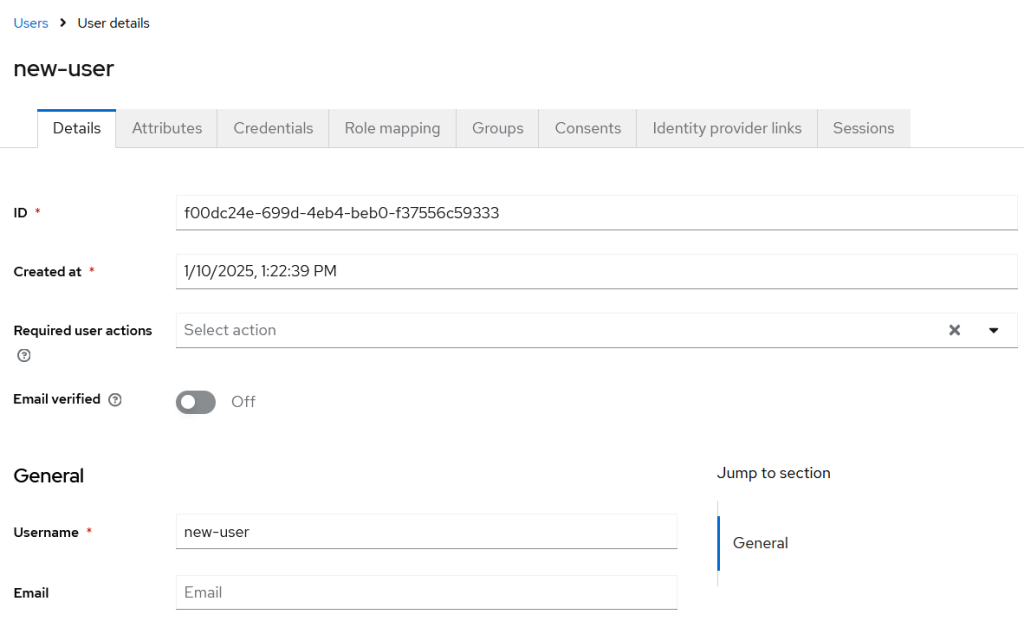
In Keycloak, create a user that will be used for authentication. Assign a password to this user.
For example, in my case, I have created a user with the username new-user.
Now, everything is ready for authentication using the Username and Password with the Authorization Code flow, we can also use Resource Owner Password flow but I skipped this option. Use it, for example, if you are playing with curl.
Access token details
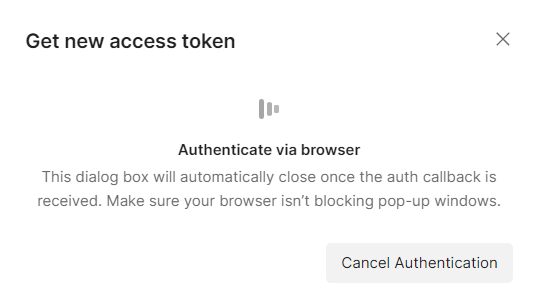
To verify this, scroll down to Get New Access Token in Postman and click on it. You will be redirected to the Keycloak login page, where you can log in. Once authenticated, Keycloak will return an Authorization Code, which Postman will then exchange for an access token.
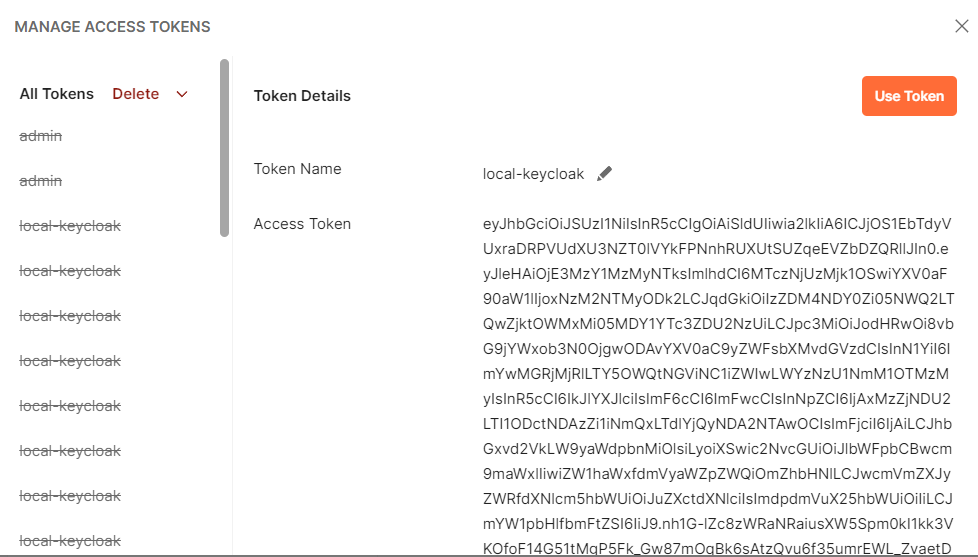
The data block of our token is shown below:
 "iat": 1736533277,
  "auth_time": 1736532896,
  "jti": "25ad6d5b-d953-42c7-b0c3-1196c18c557a",
  "iss": "http://localhost:8080/auth/realms/test",
  "aud": "account",
  "sub": "f00dc24e-699d-4eb4-beb0-f37556c59333",
  "typ": "Bearer",
  "azp": "app",
  "sid": "0136c456-2587-403f-b6d1-7eb424065008",
  "acr": "0",
  "allowed-origins": [
    "/*"
  ],
  "realm_access": {
    "roles": [
      "default-roles-test",
      "offline_access",
      "uma_authorization"
    ]
  },
  "resource_access": {
    "account": {
      "roles": [
        "manage-account",
        "manage-account-links",
        "view-profile"
      ]
    }
  },
  "scope": "email profile",
  "email_verified": false,
  "preferred_username": "new-user",
  "given_name": "",
  "family_name": ""
}
Take note that we have the following blocks:
- realm_access
- resource_access
These blocks are related to the user’s permissions, which are inherited by default from the special “composite” default role created automatically by Keycloak for each realm. For example, in my case, this role is default-roles-test, as shown below:
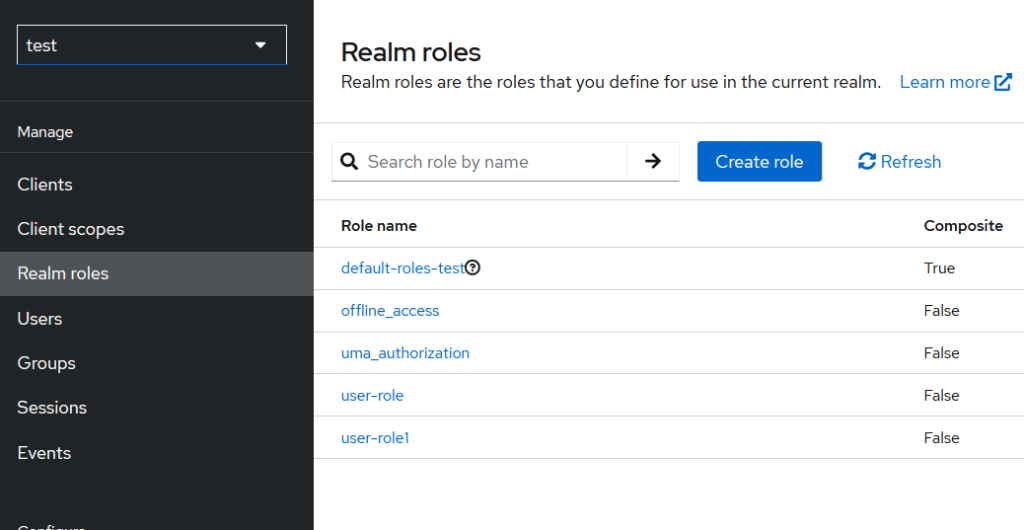
which includes these default roles
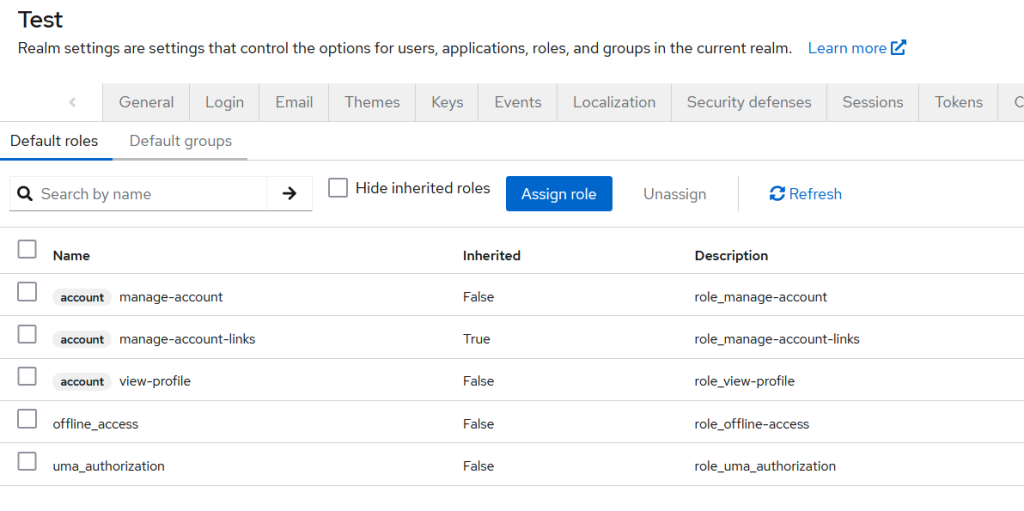
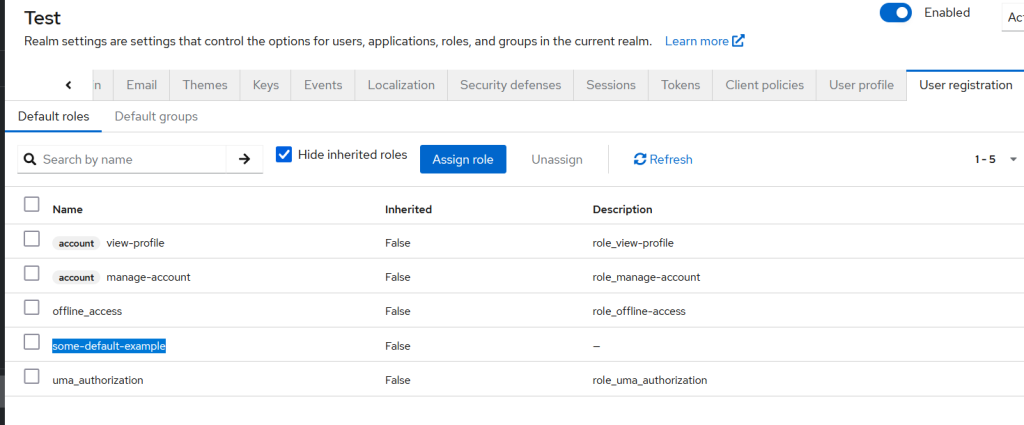
You can also find these default roles in Realm Settings > User Registration tab. All of these roles are set up during the realm creation process – https://github.com/keycloak/keycloak/blob/812d849c783dbee23fcfb7266ce66321665de2bd/services/src/main/java/org/keycloak/services/managers/RealmManager.java#L123
public RealmModel createRealm(String id, String name) {
        if (id == null || id.trim().isEmpty()) {
            id = KeycloakModelUtils.generateId();
        }
        else {
            ReservedCharValidator.validate(id);
        }
        ReservedCharValidator.validate(name);
        RealmModel realm = model.createRealm(id, name);
        realm.setName(name);

        // setup defaults
        setupRealmDefaults(realm);

        KeycloakModelUtils.setupDefaultRole(realm, Constants.DEFAULT_ROLES_ROLE_PREFIX + "-" + name.toLowerCase());
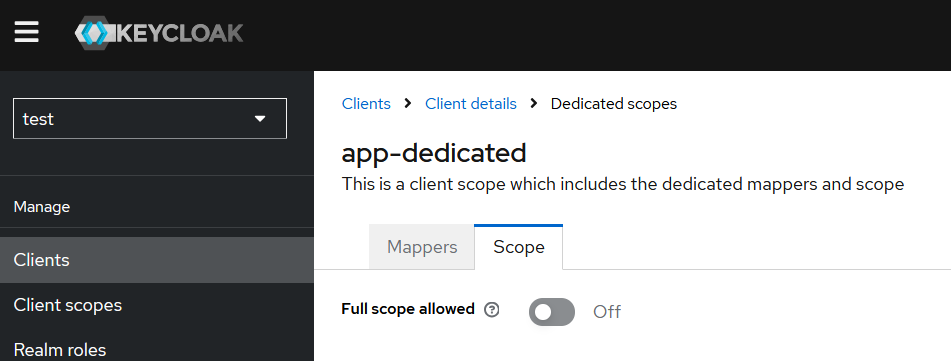
It’s also important to understand that in order to assign these default roles to the OIDC client, the “Full scope allowed” option must be enabled (which is not recommended) or roles are separately assigned to the OIDC client (OIDC client / Client Scopes / … -dedicated / Scope)
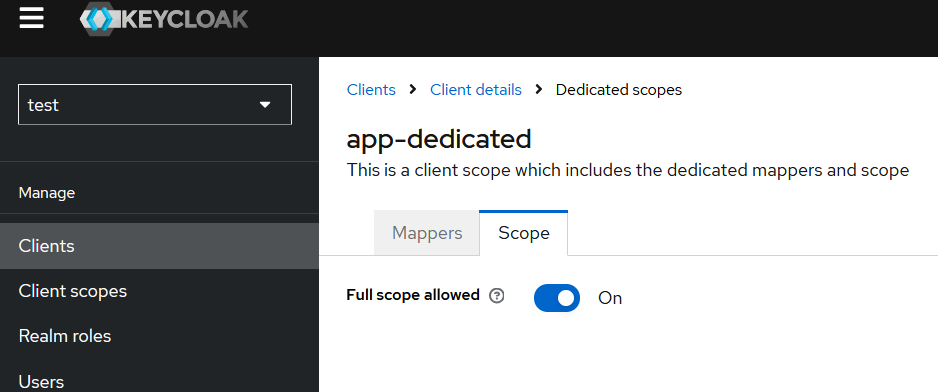
If we switch Full scope allowed to OFF, the resultant token payload will be:
{
  "exp": 1736538870,
  "iat": 1736538570,
  "auth_time": 1736538567,
  "jti": "18a96078-81f9-431d-8d04-957df359b7e0",
  "iss": "http://localhost:8080/auth/realms/test",
  "sub": "f00dc24e-699d-4eb4-beb0-f37556c59333",
  "typ": "Bearer",
  "azp": "app",
  "sid": "bdd6ce0a-f26a-43c7-8801-7f6b7f66472d",
  "acr": "1",
  "allowed-origins": [
    "/*"
  ],
  "scope": "email profile",
  "email_verified": false,
  "preferred_username": "new-user",
  "given_name": "",
  "family_name": ""
}
But with Full Scope allowed previously enabled, we got the “manage-account” role. Where does it come from?
This role is specific to the special “account” client that is configured with each newly created realm and allows access for the user tothe special undocumented Account REST API
This role is automatically mapped to users. You can verify this by navigating to Users > [some user] > Role Mappings, where it is inherited from the realm settings. As a result, these roles are directly related to the user.
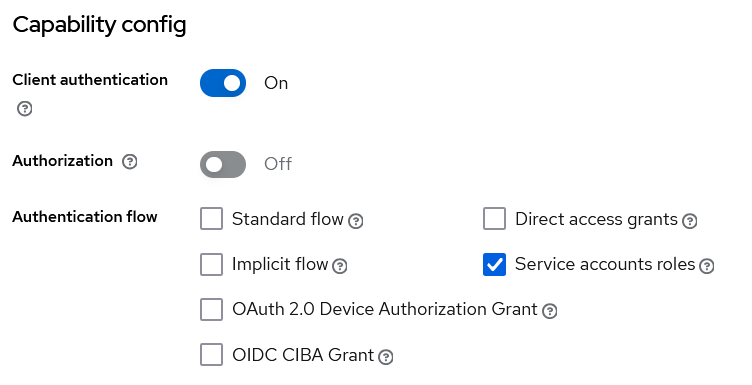
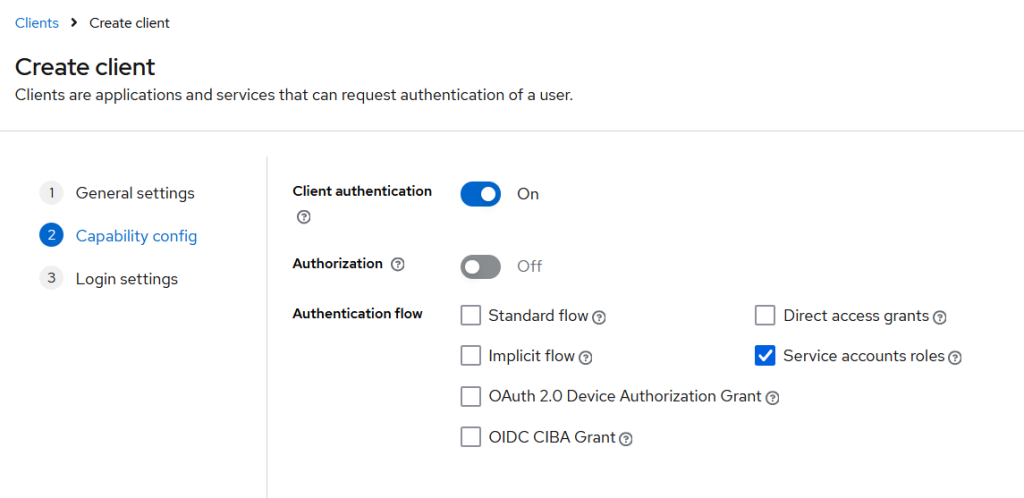
You might ask, with the client_credentials grant type flow, we also get these roles even without a user. This can be easily verified by creating an OIDC client and setting it up accordingly.
- Client authentication = on
- Service accounts roles = enabled
And then perform a request like this:
curl --location 'http://localhost:8080/auth/realms/test/protocol/openid-connect/token' \
--header 'Content-Type: application/x-www-form-urlencoded' \
--data-urlencode 'grant_type=client_credentials' \
--data-urlencode 'client_id=test-client' \
--data-urlencode 'client_secret=MiKJOZyKxRmN5n8R8vUYIIofJ7yYsgFL'
The trick here is that each OIDC client with “Service account roles” enabled will automatically have roles assigned to it, even without a user being involved.
These user-related characteristics can be found in the “Service Account Roles” tab.

simply click on the “service-account-test-client” HTTP link (your OIDC client name will be prefixed with “service-account” and located under the “Users” category).

The “manage-account” role allows access to the Keycloak Account REST API. This API enables users to manage their own account settings. Although this API is undocumented, you can find some examples on the internet, such as this one.
This API allows a user to manage their own settings using their JWT. You should also ensure that this API is enabled in your Keycloak configuration.
Let’s get back to our Client Scope from the simple experiment. We have “Full Scope Enabled” = ON for our app OIDC client. Now, let’s set the assigned type for the “roles” scope to “Optional”.

After this configuration, our token payload will no longer contain any role-related information, as shown below:
{
  "exp": 1736542032,
  "iat": 1736541732,
  "auth_time": 1736541568,
  "jti": "0b4e65ba-b92d-4df2-bc5f-96e468ecd4fd",
  "iss": "http://localhost:8080/auth/realms/test",
  "sub": "f00dc24e-699d-4eb4-beb0-f37556c59333",
  "typ": "Bearer",
  "azp": "app",
  "sid": "3e22ae24-68c2-4ea6-818e-10d7d96a0dac",
  "acr": "0",
  "allowed-origins": [
    "/*"
  ],
  "scope": "email profile",
  "email_verified": false,
  "preferred_username": "new-user",
  "given_name": "",
  "family_name": ""
}
If we add “roles” to the Scope field in Postman,

we will receive all roles again in the token payload
{
  "exp": 1736542227,
  "iat": 1736541927,
  "auth_time": 1736541568,
  "jti": "12efcf72-2c71-4cdf-8e31-6a7135e7a37f",
  "iss": "http://localhost:8080/auth/realms/test",
  "aud": "account",
  "sub": "f00dc24e-699d-4eb4-beb0-f37556c59333",
  "typ": "Bearer",
  "azp": "app",
  "sid": "3e22ae24-68c2-4ea6-818e-10d7d96a0dac",
  "acr": "0",
  "allowed-origins": [
    "/*"
  ],
  "realm_access": {
    "roles": [
      "default-roles-test",
      "offline_access",
      "uma_authorization"
    ]
  },
  "resource_access": {
    "account": {
      "roles": [
        "manage-account",
        "manage-account-links",
        "view-profile"
      ]
    }
  },
  "scope": "email profile",
  "email_verified": false,
  "preferred_username": "new-user",
  "given_name": "",
  "family_name": ""
}
so, we understand the first important aspect: when the Client Scope is configured as “Optional”, in order for it to work, it must be explicitly set in our request to the Auth endpoint.
http://localhost:8080/auth/realms/test/protocol/openid-connect/auth?response_type=code&client_id=app&scope=roles&redirect_uri=https%3A%2F%2Foauth.pstm
Try experimenting with this by installing the Postman Interceptor extension for your browser. It will allow you to capture traffic and observe the details of your requests and responses.
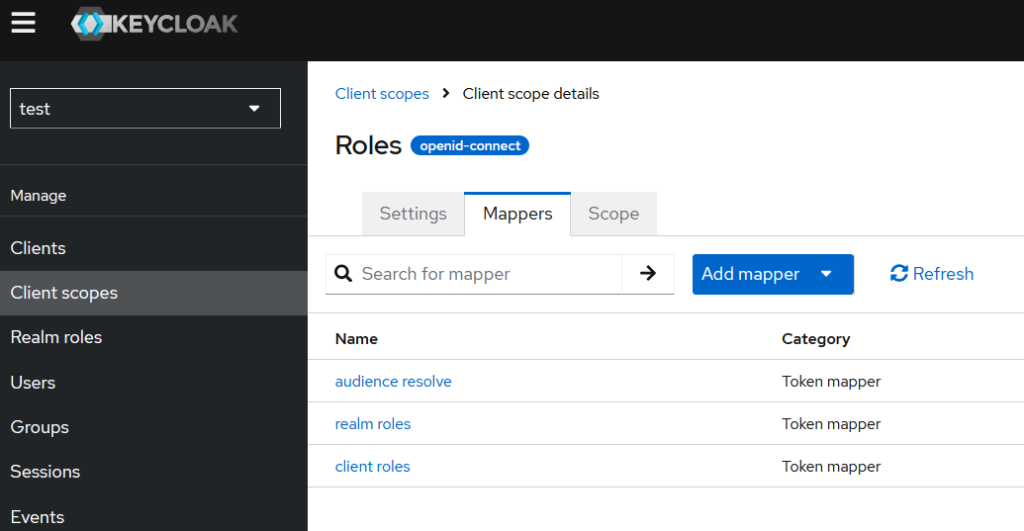
The second important aspect is that this Client Scope, if we take a closer look at it, may have mappers.
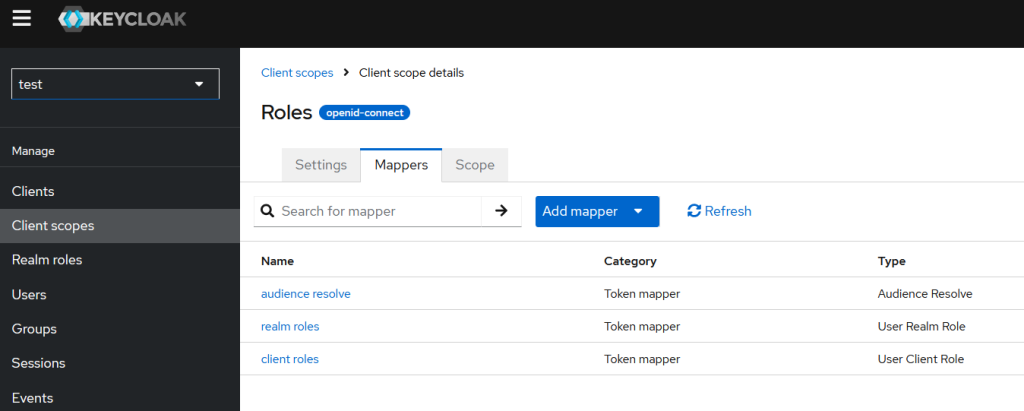
that are responsible for mapping particular roles to the claims:
- realm roles to claim with name realm_access.roles
- client roles to claim with name resource_access.${client_id}.roles
This matches exactly the JWT payload structure we observed earlier in our JWT tokens.
  "realm_access": {
    "roles": [
      "default-roles-test",
      "offline_access",
      "uma_authorization"
    ]
  }
and
"resource_access": {
    "account": {
      "roles": [
        "manage-account",
        "manage-account-links",
        "view-profile"
      ]
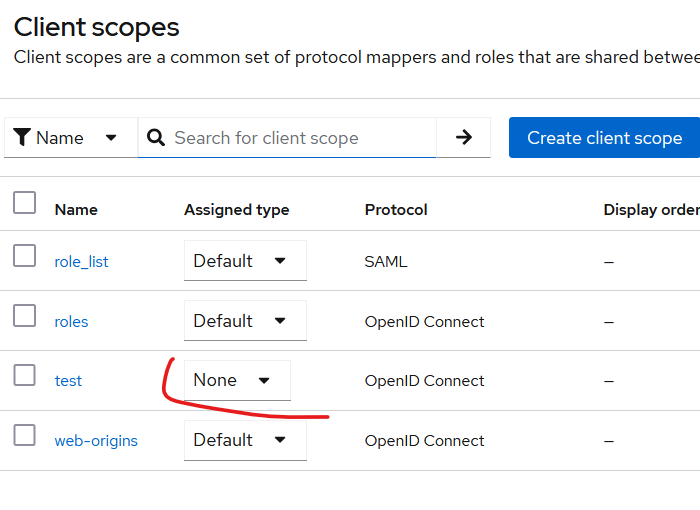
The third aspect is that every time a new OIDC client is created, the entire list of client scopes from the Client Scopes category is automatically assigned to the client, except for those with Assigned Type = None, as shown below:
Client scopes and limiting the user roles
The concept of Client Scopes also revolves around limiting the user roles that are included in the token. Let’s imagine that we have hundreds of Realm roles, all of which are assigned to users or groups of users. Additionally, let’s assume we have 20 different applications: some are mission-critical, while others are less significant, like dictionary-type apps.
For each of these 20 apps, we create 20 OIDC clients with the “Full Scope Allowed = ON” parameter. Some of our users are administrators of mission-critical applications and have roles that allow them to transfer millions of dollars. With the aforementioned configuration, after these users authenticate in a non-critical application (like the one providing dictionary-related information), the resultant token will contain Realm roles that permit transferring millions of dollars. This situation applies to other applications as well.
If one of these applications were compromised by an attacker, the intruder would obtain a token that could authorize million-dollar transactions.
This is where we need to use Client Scopes to limit the roles included in the resultant token. To achieve this, we can disable Full Scope Allowed and manually add the roles that are permitted to be included in the token. This feature acts as an intersection between the user’s roles and the explicitly set roles in the Scope tab.
This, I assume, is where the term “scope” comes from. The scope dictates and limits which roles are included in the token. Despite this, the official documentation and UI help are not always intuitive in conveying these nuances. In my experience, you need to experiment with tools like Postman or write some code to truly understand how they work.
So, it is recommended to set Full Scope Allowed to Off by default. This approach makes sense, especially in cases where we have different users with different Realm roles and need to limit the spread of these roles to application-specific tokens.
Another interesting aspect of Client Scopes comes from this Keycloak UI message:
Info alert:If there is no role scope mapping defined, each user is permitted to use this client scope. If there are role scope mappings defined, the user must be a member of at least one of the roles.
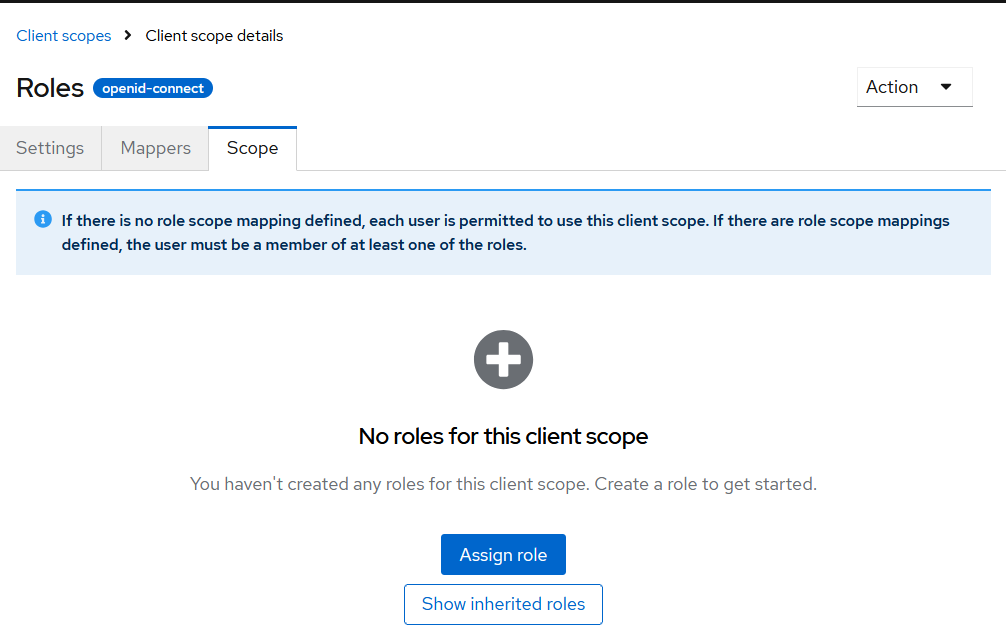
By default, all users are allowed to use the Client Scope, meaning all roles of the user are included in the final token after authentication. However, using this functionality, we can limit which users are allowed to use these Client Scope mechanisms.
To do this, we create a specific role that grants permission to use the Client Scope and assign it here. Only users who have at least one of the assigned roles will be allowed to use the Client Scope. This functionality is available for all Client Scopes, except for “-dedicated” ones (e.g., app-dedicated for the OIDC client app), as these are application-specific scopes.
Taking this into account, we can create a Client Scope that, using a mapper, adds specific information to the token only for users who have a specific role. For example, we can add the “super-admin” claim to the token only for users who have the “super-admin” role.
Another useful Keycloak functionality that can assist in experimenting with all of this is the ability to evaluate the resultant information (protocol mappers, role scope mappings, tokens, etc.) based on a given OIDC client and user. This functionality can be found under the “Client Scopes” tab.

Keycloak client scopes and configuring OAuth scopes for OIDC applications
Now, let’s take a look at another aspect of Client Scopes. By using Client Scopes, we can create OAuth scopes as described in the OAuth specifications. We haven’t noticed it yet, but Keycloak roles are not defined by the OAuth specs, whereas OAuth scopes are documented, meaning that support for OAuth scopes is available out-of-the-box in popular frameworks.
OAuth scopes can also be translated into Keycloak roles, but we will examine that later.
OAuth scopes, which are commonly used when interacting with services like Google or Facebook, are an important concept. Explore them, but first, we need to understand the concept of “consent.”
The OAuth specification is not about authentication but about delegation. The primary problem it solves is the situation where users reuse their credentials to allow third-party applications to perform actions on their behalf. Before OAuth, if you wanted to allow a third-party app to authenticate in Google, you would need to provide your credentials directly to that application. The delegation model of OAuth solves this problem by:
- consent
- oauth scopes
Consent is the process of selecting the permissions that are granted to a third-party application. OAuth scopes, in turn, are simply text claims stored in the token that represent these permissions.
Go ahead with experiments of this functionality in Keycloak. Assume we have a web app that allows customers to customize and automate their payments. Additionally, there is a third-party application that provides payment information aggregation services, and our customer would like to use it. This way, they won’t be required to provide their login and password every time the third-party app requests the information.
Go to “Client Scope” and create two Client scopes:
- payment:create
- payment:view
Both of these Client Scopes have Assigned Type = None, meaning they will not be automatically propagated to all OIDC clients. Now, let’s create an OIDC client with the name “3rd-app” and configure it with the following options:
- Authentication Flow = Standard Flow
- Valid redirect URIs = https://oauth.pstmn.io/v1/callback
- Consent required = ON
Try to authenticate with this client in Postman by replacing the Client ID from “app” to “3rd-app”. After doing so, we will be prompted with the consent screen
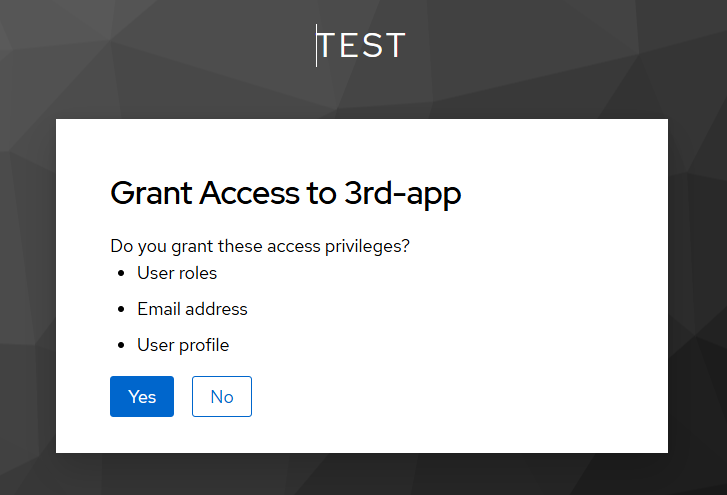
and have to choose whether to allow a specific grant to the 3-rd party app.
Set Full Scope Allowed = OFF for this OIDC client, and add the two newly created OAuth scopes:
- payment:create
- payment:view
to our “3rd-app” OIDC client.
After this configuration, when we authenticate in Keycloak via Postman, we will be prompted with the two new OAuth scopes.

we can explicitly request the required scopes by passing them to the Scope field in Postman, or by making the first GET request in the Authorization Code flow. However, since the scopes shown above are default, they will be included automatically

so they will remain in the consent window.
Specify the Optional “Assign Type” for the OAuth scopes displayed in the consent window for the 3rd-app OIDC client. This way, only the client scopes with the Default assign type will remain on the OIDC client.
- acr
- basic
- roles
- web-origins
now , you are prompted only with one oauth scope

and final claims in JWT token are
{
  "exp": 1736950741,
  "iat": 1736950441,
  "auth_time": 1736949804,
  "jti": "342e3f3a-e6c9-4759-8d6b-f4b3ab5ce708",
  "iss": "http://localhost:8080/auth/realms/test",
  "aud": "account",
  "sub": "f00dc24e-699d-4eb4-beb0-f37556c59333",
  "typ": "Bearer",
  "azp": "3rd-app",
  "sid": "0cbacf88-8cd3-4395-8b14-b81e18491b99",
  "acr": "0",
  "allowed-origins": [
    "https://oauth.pstmn.io"
  ],
  "realm_access": {
    "roles": [
      "default-roles-test",
      "offline_access",
      "uma_authorization"
    ]
  },
  "resource_access": {
    "account": {
      "roles": [
        "manage-account",
        "manage-account-links",
        "view-profile"
      ]
    }
  },
  "scope": ""
}
scope claim is empty.
By explicitly adding these values to the Scope field
payment:view payment:create
we get consent window
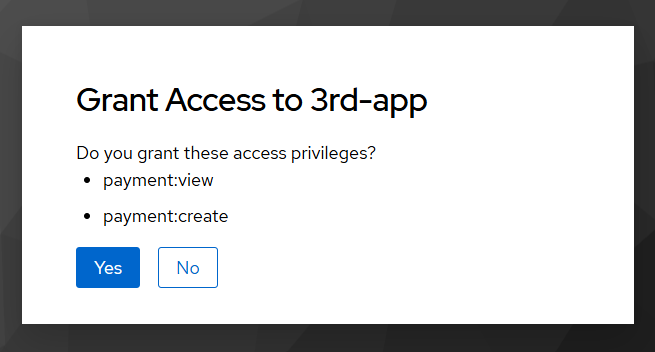
so this now looks similar to the typical consent windows of other OAuth server without strangle “User roles”.
The issued JWT doesn’t contain approved scopes
{
  "exp": 1736950900,
  "iat": 1736950600,
  "auth_time": 1736949804,
  "jti": "7e3815b8-3292-402d-b406-79d176597003",
  "iss": "http://localhost:8080/auth/realms/test",
  "aud": "account",
  "sub": "f00dc24e-699d-4eb4-beb0-f37556c59333",
  "typ": "Bearer",
  "azp": "3rd-app",
  "sid": "0cbacf88-8cd3-4395-8b14-b81e18491b99",
  "acr": "0",
  "allowed-origins": [
    "https://oauth.pstmn.io"
  ],
  "realm_access": {
    "roles": [
      "default-roles-test",
      "offline_access",
      "uma_authorization"
    ]
  },
  "resource_access": {
    "account": {
      "roles": [
        "manage-account",
        "manage-account-links",
        "view-profile"
      ]
    }
  },
  "scope": ""
}
in the “scope” claim. The reason for this is that, as we have seen earlier, a Client Scope is a much broader entity than just the OAuth scope displayed on the Consent screen. Each Client Scope has the following parameters:
- Displays on consent screen
- Include in token scope
so we just forgot to check the “Include in token scope” checkbox. After changing these parameters, we now have:
 },
  "scope": "payment:view payment:create"
}
and now these scopes can be used for authorization decisions in microservices.
It’s still interesting why the “Roles” client scope, shipped out of the box, has “Display on consent screen = ON, as it mainly performs important background work by moving roles into JWT claims.
I assume it’s better not to display the “Roles” client scope on the consent screen, as it primarily handles background tasks, such as moving roles into JWT claims.
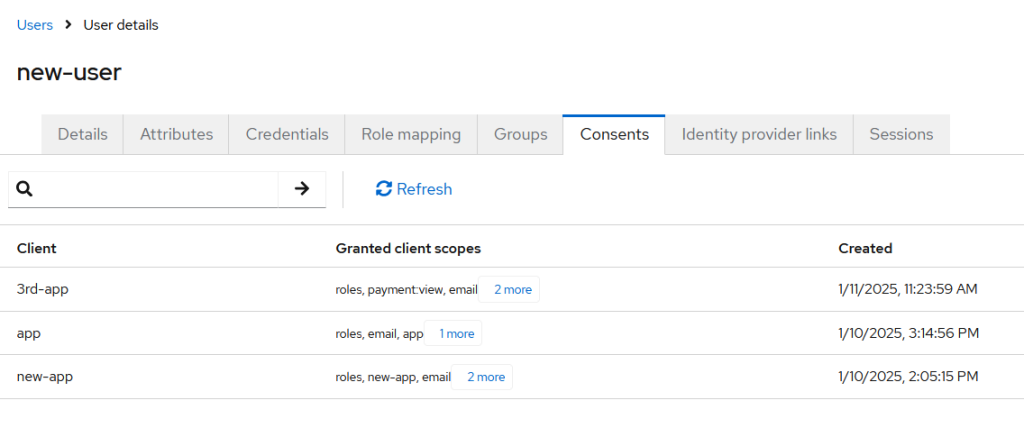
Also, please note that if you’ve already granted consent to a given OIDC client, you will not be prompted with the consent screen again until you delete the consent from the Users UI under Users > Consents.
That’s not all about Client Scopes. As you can see now, they can serve as a mechanism for the automatic propagation of OIDC client-specific configurations to all OIDC clients.
Suppose we have two JWT tokens created for internal and external services. By default, using Client Scope and Mapper configuration, we can assign a specific claim like “internal-token” to the token. After this configuration, the authorization logic across all microservices could be:
- allow by default all requests with JWT tokens that have this claim, and reject all others.
- for services that are publicly (internet) facing, simply modify the authorization logic so they also accept requests from outside.
Also, just keep in mind that you can create your own custom mapper by writing a custom SPI (Service Provider Interface).
You can extend a specific class like AbstractOIDCProtocolMapper (refer to the official Keycloak server development guide) for more information, or check out this example on Baeldung.
Custom mappers that are assigned to the client through Client Scope are a powerful ability to implement useful functionality. For example, we have the following requirements:
- There is an old monolith web app that doesn’t use Keycloak or any OAuth/OIDC server, and it has its own database with users. Additionally, we can’t use SAML/OIDC for identity provisioning or rely on Keycloaks user storage SPI functionality to interact with the API of this monolith. The reason is that there are no resources available to implement this integration within the legacy monolith.
- we have a new mobile app and backend services developed as microservices, which are actively being worked on. Additionally, the onboarding process for this new app involves using the Keycloak Admin REST API to create new users.
- the new functionality of the microservices is interesting for use in our monolith, but the challenge is how we would propagate the user context from the monolith to the microservice. Typically, this is done by using a JWT with a special claim, like
user_id, but the old app doesn’t support this.
The simplest solution would be to use the client_credentials grant type flow, but this introduces a challenge: our microservice can’t perform correct authorization decisions (especially when it needs to be more granular for the new mobile app). By relying on this flow, the microservice would be fully trusting the service, which violates the principle of least privilege.
We can solve this problem using a custom mapper. The old app can send a header with its old user ID, which is signed using HMAC. The custom mapper can validate the signature and then add the old user ID to the JWT. The final step would involve creating a mapping between the old and new users, and this mapping can be checked on the backend to ensure the request originates from the appropriate user.
Another practical example we are company A that have n different cloud applications:
- payments
- games
How to use OAuth scope so our users could grant specific access to 3-rt party applications? First, we need to uniquely identify each scope to avoid collisions like scope with the name “read” for mail and payments cloud service, thus we can create these ones:
- mail:read
- payments:read
- games:read
We can go further if we need more granularity, and each of our cloud service has a different API this could be:
- mail:support:read
- payments:billing:view
- etc
OAuth Scopes are just arbitrary strings, and it is up to you to define a proper authorization / access model. With OAuth scopes you can implement proper authorization by just do the following:
- define access model for your service
- create OAuth scopes using “Client Scopes” to separate them between apps use Assign type = none to avoid propagation to all OIDC clients
- assign OAuth scope in “Client Scopes” to specific OIDC clients that are allowed to use them
- now request these scopes if they are needed , do not forget to set “Include in token scope” = ON
- on your microservices check that JWT of HTTP request has appropriate OAuth scopes during authorization decision
The another advice is to use some gitops approach so all your authorization configuration should be written in the code (yaml, json, terraform and so on) and not hardcoded in the service code to avoid spaghetti of trust
And in the end there is one tricky moment with “Full scope allowed=ON” in Keycloak. In older versions of Keycloak this option was enabled by default and you could incindenlty be surprised by how this option works on the practice. Let’s assume that you decided to automatically assign some User’s specific role to all users of realm right after user’s registration using Realm settings / User Registration / Default roles. This is role with the name “some-default-example” in our example
Now another team created OIDC client that is going to be used for service to service authentication with “Service account roles” enabled
This OIDC client is not related to the users, but if we check for this OIDC client – Client scopes / Service account roles , there will be – “To manage detail and group mappings, click on the username service-account-service

and Keycloak User’s UI displays info about your OIDC client. In “Role mapping” tab, after unchecking “Hide inherited roles” you will find that the role assigned to the Users will also be automatically propagated to this OIDC client
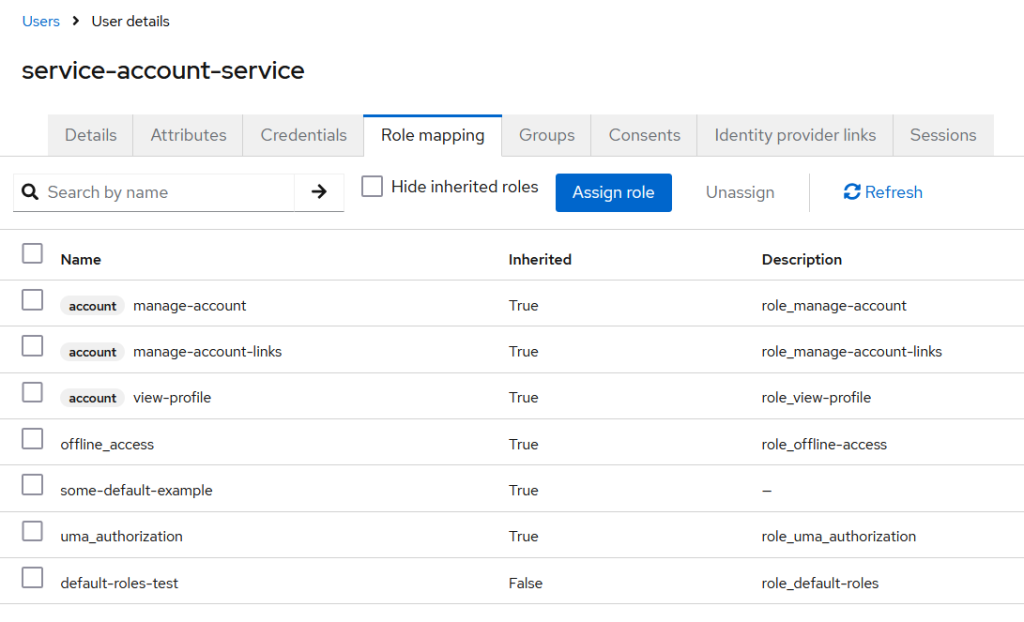
Thus, avoid using Full scope allowed = ON for your OIDC clients as much as possible.