Once, I returned to an old project in C/C++. I saw several interesting ideas in it and wanted to revive it and rewrite part of the code to align with best practices (since previously it resembled more of a Proof of Concept). When I started working on it, for someone who hadn’t used C/C++ for a while, it seemed quite unusual and inconvenient in terms of dependency management compared to the simplicity of Java, Golang, and C#.
I needed to organize the project hierarchy in the solution, and some of these projects included unit tests. I looked at how this was done in the current old project; everything works with testing correct. However, compared to the Java world, where you have dependencies explicitly defined in pom.xml or build.gradle, in Visual Studio when developing in C/C++, there are several options for how to do this. Often, for cross-platform projects, CMake is chosen, but if you go with a very simple option, it can be done through the UI, and under the hood, such files are changed like:
- sln
- vcxproj
- vcxproj.filters
- vcxproj.user
In this story, the only comforting thing is that understanding what happens under the hood can be provided by the Git history. We also shouldn’t forget about MSBuild, but the UI is often the obvious choice for many reasons.
The first thing I needed to refactor was the tests. The old project uses Microsoft Visual Studio C++ Unit Test Framework and it was a mystery to me how the dependencies were configured, aside from the standard references.
So, I looked into the documentation for the Microsoft Visual Studio C++ Unit Test Framework and sketched out a test project with a test class to get a feel for everything on simpler code before going on to refactor, considering the fact that I hadn’t worked with C/C++ and Microsoft technologies for a long time. Then I realized that this might be of interest to someone, for example, a Java developer who, for some reason, needed to see how some product works in C/C++, so I decided to document everything. Of course, for an experienced C/C++ developer, there’s nothing interesting in this article, in my opinion.
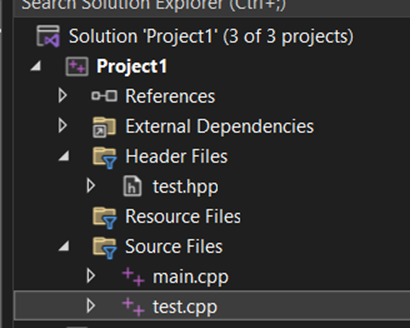
It looked like this: I created a simple console application test project and added two files to it:
- test.hpp
- test.cpp
and everything worked, where test.hpp
#ifndef TEST_H
#define TEST_H

class Test {
public:
	int GetA();
private:
	int a = 10;
};
#endif
test.cpp
#include "pch.h"
#include "framework.h"

int Test::GetA()
{
	return a;
}
The project looks as follows:
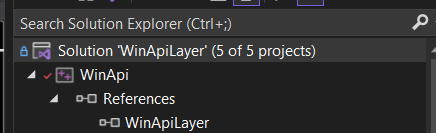
Next, a separate project named UnitTest1 was created, with the project type set to Native Unit Test Projects, and Project1 (which contains the class to be tested) was added to the references. This is necessary to do according to the same documentation.

And the next step is to include the header file for the tests in the project.
#include "../Project1/test.hpp"
and our simple test code looks as follows
#include "pch.h"
#include "CppUnitTest.h"

using namespace Microsoft::VisualStudio::CppUnitTestFramework;

namespace UnitTest1
{
	TEST_CLASS(UnitTest1)
	{
	public:

		TEST_METHOD(TestMethod1)
		{
			Test test;
			Assert::AreEqual(10, test.GetA());
		}
	};
}
The IDE was not highlighting errors at that moment, but that didn’t mean they won’t appear at the linking stage. The linker and how it works in C/C++ is another story altogether, but let’s return to running the test; of course, it didn’t work due to the following error
Severity Code Description Project File Line Suppression State
Error LNK1120 1 unresolved externals UnitTest1 C:\Users\kosti\source\repos\Project1\x64\Debug\UnitTest1.dll 1
Error LNK2019 unresolved external symbol "public: int __cdecl Test::GetA(void)" (?GetA@Test@@QEAAHXZ) referenced in function "public: void __cdecl UnitTest1::UnitTest1::TestMethod1(void)" (?TestMethod1@UnitTest1@1@QEAAXXZ) UnitTest1 C:\Users\kosti\source\repos\Project1\UnitTest1\UnitTest1.obj 1
What’s the problem? First, the code and header files are compiled into so-called object files, and only after that does the linker combine them (in our case, into a DLL). This error means that the linker was unable to find the method of our test class in any of the object or library files at the time of linking.
Test::GetA(void)
If these files were part of the UnitTest1 project, we wouldn’t have any issues with this.
Let’s consider how we can solve this problem. The first approach may be useful in certain situations, but initially, let’s look at the incorrect parameter to better understand what it is responsible for and why it isn’t working.
In Visual Studio, in the Linker settings
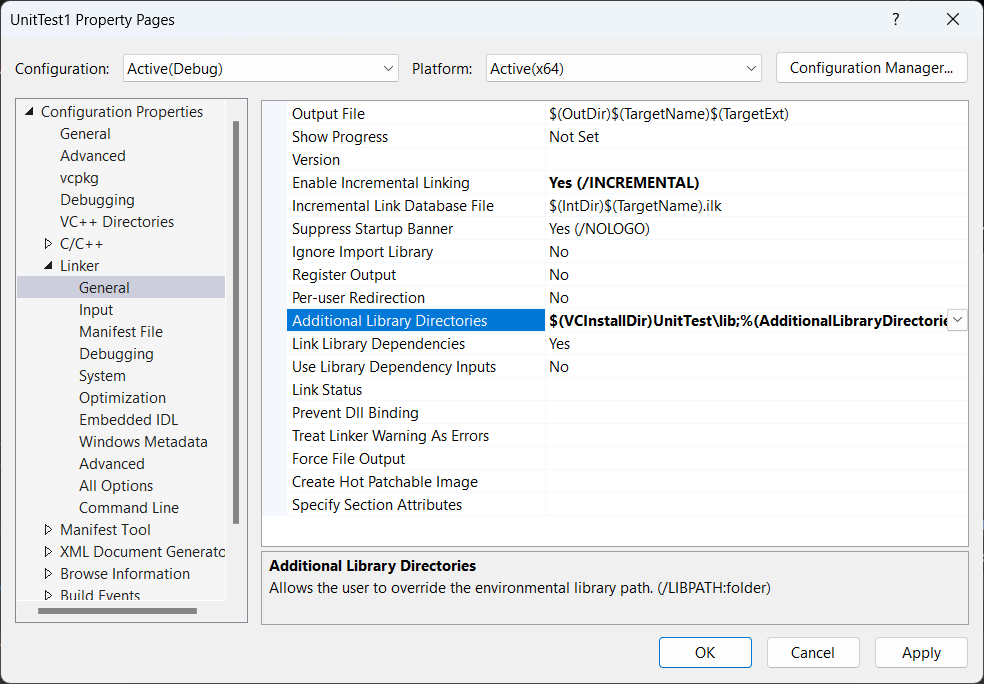
We will select Additional Library Directories and try to specify the path to the object file, which at the filesystem level is named test.obj after compiling our test class.

By the way, you can’t copy the value here, only the key. I have often been amazed by some of the things done in Microsoft, various Group Policy snap-ins, etc., where copying is not allowed is a separate story, but here? Why do it this way?
And we encounter the following problem: we may have different build types:
- Release
- Debug
Currently, it is built in Debug, so the path for Release will, of course, be different. Do we need to change this every time?
Now everything looks like this:
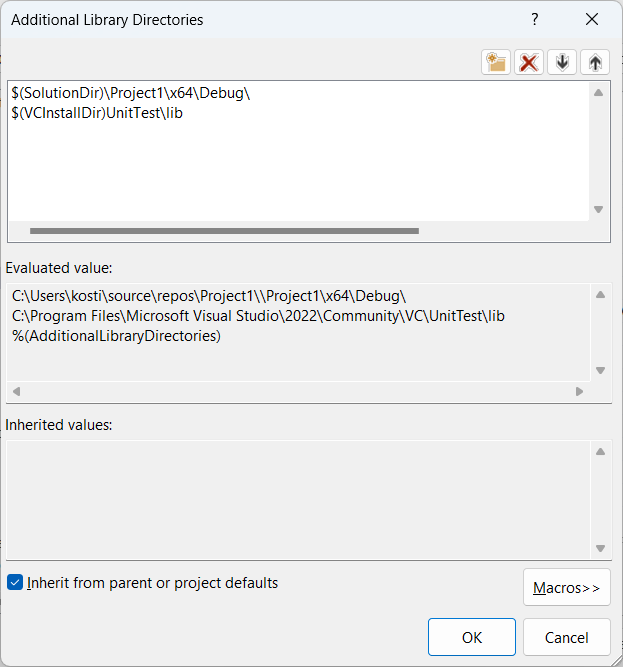
But the error, of course, remains because we used the wrong parameter. We added the value for Additional Library Directories, which will be the following directories for the linker.
/OUT:"C:\Users\kosti\source\repos\Project1\x64\Debug\UnitTest1.dll" /MANIFEST /NXCOMPAT /PDB:"C:\Users\kosti\source\repos\Project1\x64\Debug\UnitTest1.pdb" /DYNAMICBASE "kernel32.lib" "user32.lib" "gdi32.lib" "winspool.lib" "comdlg32.lib" "advapi32.lib" "shell32.lib" "ole32.lib" "oleaut32.lib" "uuid.lib" "odbc32.lib" "odbccp32.lib" /IMPLIB:"C:\Users\kosti\source\repos\Project1\x64\Debug\UnitTest1.lib" /DEBUG:FULL /DLL /MACHINE:X64 /INCREMENTAL /PGD:"C:\Users\kosti\source\repos\Project1\x64\Debug\UnitTest1.pgd" /SUBSYSTEM:WINDOWS /MANIFESTUAC:"level='asInvoker' uiAccess='false'" /ManifestFile:"x64\Debug\UnitTest1.dll.intermediate.manifest" /LTCGOUT:"x64\Debug\UnitTest1.iobj" /ERRORREPORT:PROMPT /ILK:"x64\Debug\UnitTest1.ilk" /NOLOGO /LIBPATH:"C:\Users\kosti\source\repos\Project1\Project1\x64\Debug\" /LIBPATH:"C:\Program Files\Microsoft Visual Studio\2022\Community\VC\UnitTest\lib" /TLBID:1Where our path is /LIBPATH.
You can view the final directives in Linker / Command Line, which is often useful for comparison or debugging.
LIBPATH is the path to library files with the .lib extension, but we have the .obj extension, so a different approach is needed here.
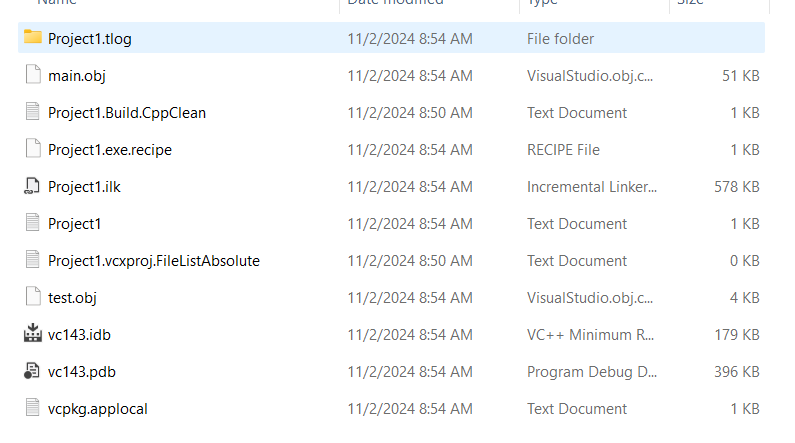
Let’s make another mistake and manually add the .obj file from the directory.
C:\Users\kosti\source\repos\Project1\Project1\x64\Debug\
to the directory
C:\Users\kosti\source\repos\Project1\UnitTest1\x64\Debug\
doesn’t work.
Let’s now do it differently; we will add the dependency through the Additional Dependencies parameter.
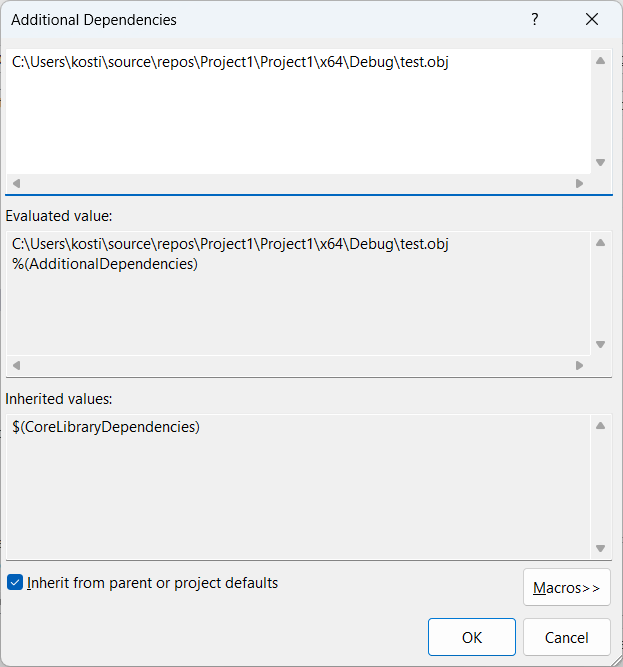
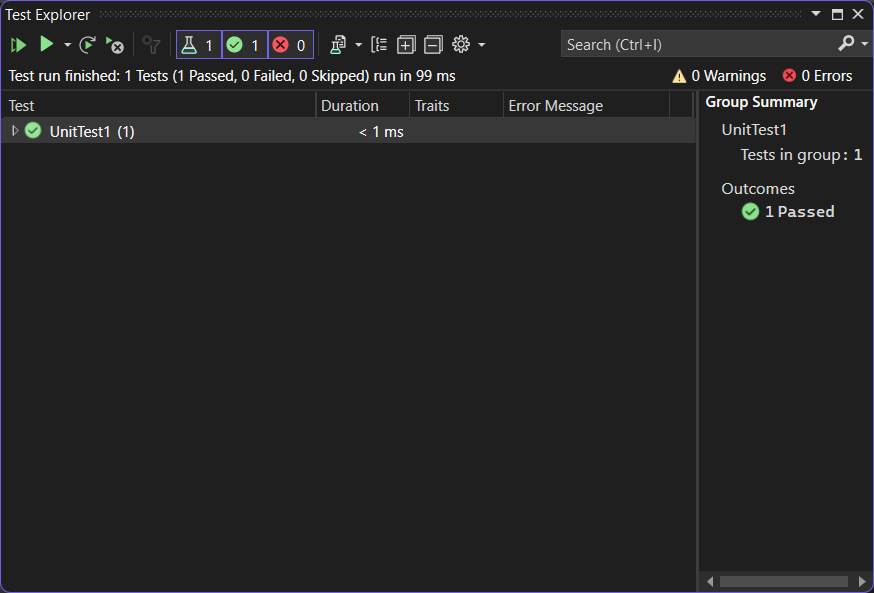
And it started to work.
Linker / Command line will now have the following form.
/OUT:"C:\Users\kosti\source\repos\Project1\x64\Debug\UnitTest1.dll" /MANIFEST /NXCOMPAT /PDB:"C:\Users\kosti\source\repos\Project1\x64\Debug\UnitTest1.pdb" /DYNAMICBASE "C:\Users\kosti\source\repos\Project1\Project1\x64\Debug\test.obj" "kernel32.lib" "user32.lib" "gdi32.lib" "winspool.lib" "comdlg32.lib" "advapi32.lib" "shell32.lib" "ole32.lib" "oleaut32.lib" "uuid.lib" "odbc32.lib" "odbccp32.lib" /IMPLIB:"C:\Users\kosti\source\repos\Project1\x64\Debug\UnitTest1.lib" /DEBUG:FULL /DLL /MACHINE:X64 /INCREMENTAL /PGD:"C:\Users\kosti\source\repos\Project1\x64\Debug\UnitTest1.pgd" /SUBSYSTEM:WINDOWS /MANIFESTUAC:"level='asInvoker' uiAccess='false'" /ManifestFile:"x64\Debug\UnitTest1.dll.intermediate.manifest" /LTCGOUT:"x64\Debug\UnitTest1.iobj" /ERRORREPORT:PROMPT /ILK:"x64\Debug\UnitTest1.ilk" /NOLOGO /LIBPATH:"C:\Users\kosti\source\repos\Project1\\Project1\x64\Debug\" /LIBPATH:"C:\Program Files\Microsoft Visual Studio\2022\Community\VC\UnitTest\lib" /TLBID:1 where
"C:\Users\kosti\source\repos\Project1\Project1\x64\Debug\test.obj"
It is explicitly specified as one of the parameters.
For everyone trying to understand how this works under the hood, I recommend reading the following book – https://www.amazon.com/Advanced-C-Compiling-Milan-Stevanovic/dp/1430266678, one of the best in my opinion on this topic.
Let’s return to our project. Although it has been said that this should not be done, in certain situations, this technique of adding an obj file to the linker can be useful if all you need to do is throw together a few tests for a legacy project to ensure that something doesn’t break, and you don’t want to rewrite a lot of code.
A more proper approach involves creating a static or dynamic library project. In this case, all we need to do to run our tests is to add a reference, and there is nothing else we need to do.
Let’s do it this way, we’ll create a project static library and pull our
- test.sh
- test.cpp
in this project, we will also add a reference to our static library.
However, there is a problem due to dragging files from one project to another; it seems that the compiler does not see the header files. After recreating the files through “Add Item” with the same content, everything works fine. Of course, I have no desire to double-check the .vcxproj files, and it’s easier to recreate these files.
Now, linking our test project with the library does not require any extraordinary effort from us, and the tests run without any issues. In my old project, I used a static library, so for it to work properly, it is sufficient to just add our dependency to the references.