We basically need a Windows Server for various experiments, such as studying Keycloak federation with AD, exploring different types of attacks like Kerberoasting, learning the Kerberos protocol, and ADFS and SAML integration with Keycloak and etc.
It’s not a supported installation of Windows Server on ARM architecture so a simple way is to have separate laptop with installed Windows OS where we can install Windows Server on VM
I’am not going to use Windows Server 2016 or high redaction as them are too expensive in form of cpu and memory usage compared to Windows Server 2012r2 (Windows 8.1).
To configure our setup:
First step. Download and install Oracle Virtual Box.
Second step. Download Windows Server 2012 R2 – https://www.microsoft.com/en-us/evalcenter/download-windows-server-2012-r2
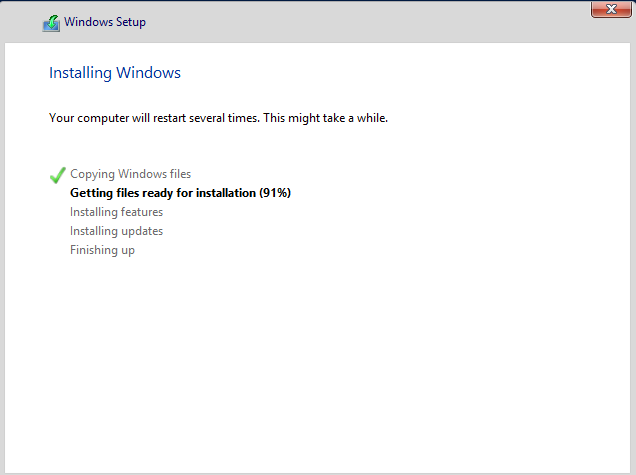
Third step, execute this this powershell script for configure and install Windows Server and just use all default parameters, but just select GUI versions of standard edition.
# Define VM parameters
$VM_NAME = "Win2016"
$ISO_PATH = "C:\Users\kosti\Downloads\Windows_Server_2016_Datacenter_EVAL_en-us_14393_refresh.ISO"
$VBOX_MANAGE = "C:\Program Files\Oracle\VirtualBox\VBoxManage.exe"
$VMS_PATH="c:\virtualbox_vms"

# Check if the VM already exists
$existingVMs = & $VBOX_MANAGE list vms
if ($existingVMs -match $VM_NAME) {
    Write-Host "VM $VM_NAME already exists. Exiting..."
    exit
}

# Create VM
& $VBOX_MANAGE createvm --name $VM_NAME --ostype "Windows2016_64" --register
& $VBOX_MANAGE modifyvm $VM_NAME --memory 4096 --cpus 2 --vram 128 --nic1 nat
& $VBOX_MANAGE modifyvm $VM_NAME --boot1 dvd --boot2 disk --boot3 none --boot4 none

# Create a virtual disk
& $VBOX_MANAGE createhd --filename "$VMS_PATH\$VM_NAME\$VM_NAME.vdi" --size 32768 --format VDI

# Create and attach storage controller
& $VBOX_MANAGE storagectl $VM_NAME --name "SATA Controller" --add sata --controller IntelAHCI
& $VBOX_MANAGE storageattach $VM_NAME --storagectl "SATA Controller" --port 0 --device 0 --type hdd --medium "$VMS_PATH\$VM_NAME\$VM_NAME.vdi"

# Attach ISO file
& $VBOX_MANAGE storagectl $VM_NAME --name "IDE Controller" --add ide
& $VBOX_MANAGE storageattach $VM_NAME --storagectl "IDE Controller" --port 0 --device 0 --type dvddrive --medium $ISO_PATH

# Configure remote desktop access
& $VBOX_MANAGE modifyvm $VM_NAME --vrde on --vrdeport 3389

& $VBOX_MANAGE modifyvm $VM_NAME --graphicscontroller vboxsvga
Also, we don’t want to use the default NAT configuration because NAT simply enables DHCP for the virtual machine, assigning it an IP from a different than local subnet. For example, if the local subnet is 192.168.0.0/24, the virtual machine can be assigned an IP from 10.0.0.0/8. However, we want a setup where multiple virtual machines run on the laptop and can be accessed from other computers on the network.
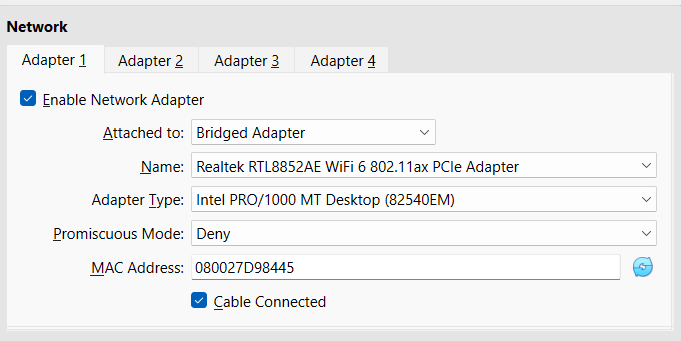
To achieve this, we need to assign them IP addresses that are available within the local network. We could use a reverse proxy, but for AD and KDC, the situation is a bit more complex. While we can allow traffic over both TCP and UDP (HAProxy supports only TCP, while Nginx supports both), Kerberos traffic might introduce additional challenges. Therefore, the simplest solution is to use a bridged network and assign a static IP address to the virtual machine from the local router’s Wi-Fi range.
For example, on the laptop, we have
Wireless LAN adapter Wi-Fi:

   Connection-specific DNS Suffix  . :
   Description . . . . . . . . . . . : Realtek RTL8852AE WiFi 6 802.11ax PCIe Adapter
   Physical Address. . . . . . . . . : E0-0A-F6-56-57-1D
   DHCP Enabled. . . . . . . . . . . : Yes
   Autoconfiguration Enabled . . . . : Yes
   IPv4 Address. . . . . . . . . . . : 192.168.1.17(Preferred)
   Subnet Mask . . . . . . . . . . . : 255.255.255.0
   Lease Obtained. . . . . . . . . . : Wednesday, February 12, 2025 10:26:40 PM
   Lease Expires . . . . . . . . . . : Friday, February 14, 2025 4:12:37 PM
   Default Gateway . . . . . . . . . : 192.168.1.1
   DHCP Server . . . . . . . . . . . : 192.168.1.1
   DNS Servers . . . . . . . . . . . : 192.168.1.1
   NetBIOS over Tcpip. . . . . . . . : Enabled
Virtual Box configuration of VM
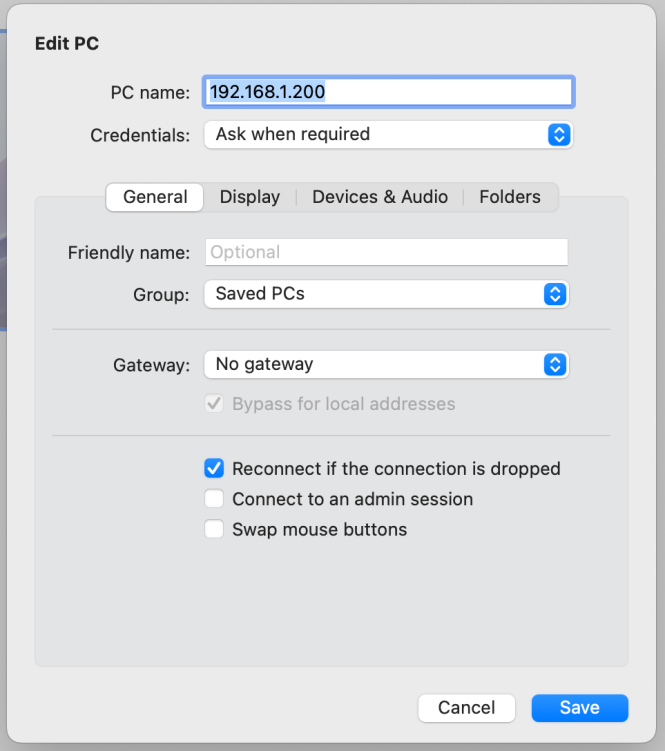
Typically, in a Wi-Fi router, you can reserve a range of IP addresses that will not be automatically assigned to network devices by DHCP. Simply take one of these addresses for the VM. For example, I took 192.168.1.200 for this server.
By default, the IP address will be assigned automatically to the VM. However, another option when the Wi-Fi router supports it is to configure a specific IP address for a given MAC address so that it is always assigned to that MAC.
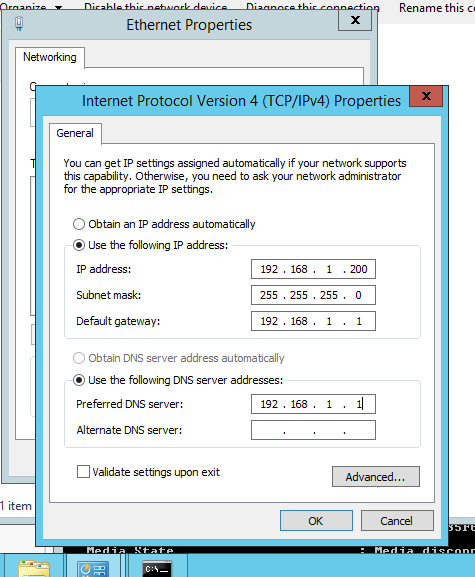
Given that the Wi-Fi router’s IP address is 192.168.1.1, I configured it on an installed Windows Server as shown below
Now, I can access this Windows Server externally from my MacBook laptop by IP address or simply hardcoding the DNS name in /etc/hosts and disable firewall using Powershell script below
# Disable firewall for all profiles (Domain, Private, Public)
Set-NetFirewallProfile -Profile Domain,Private,Public -Enabled False

# Verify the status
Get-NetFirewallProfile | Select-Object Name, Enabled
The last step is the installation of AD. To do this, execute this script
$DomainName = "ms.local"
$NetBIOSName = "ms"
$DCRole = "DomainController"
$AdminPassword = ConvertTo-SecureString "your password" -AsPlainText -Force

# Install Active Directory, DNS, and RSAT tools
Write-Host "Installing Active Directory Domain Services, DNS, and management tools..." -ForegroundColor Green
Install-WindowsFeature -Name AD-Domain-Services, DNS, RSAT-AD-AdminCenter -IncludeManagementTools

# Promote server to a Domain Controller
Write-Host "Configuring Active Directory Domain Controller..." -ForegroundColor Green
Install-ADDSForest `
    -DomainName $DomainName `
    -DomainNetbiosName $NetBIOSName `
    -SafeModeAdministratorPassword $AdminPassword `
    -Force
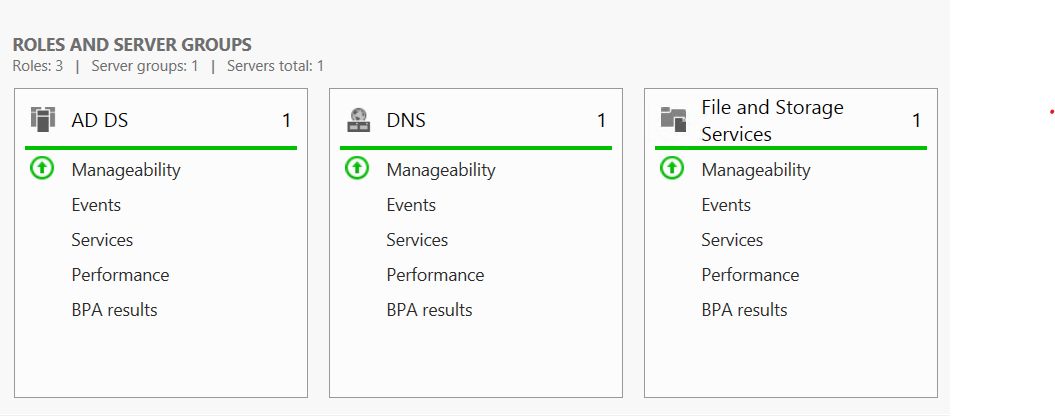
After installation, you should find these available roles
Take note that before, we had DNS server = 192.168.1.1, which pointed before to the Wi-Fi router, but after DNS role installation on Windows Server it was changed to 127.0.0.1 as shown on the following output
PS C:\Users\Administrator> ipconfig /all

Windows IP Configuration

   Host Name . . . . . . . . . . . . : WIN-L30K0AV99EE
   Primary Dns Suffix  . . . . . . . : ms.local
   Node Type . . . . . . . . . . . . : Hybrid
   IP Routing Enabled. . . . . . . . : No
   WINS Proxy Enabled. . . . . . . . : No
   DNS Suffix Search List. . . . . . : ms.local

Ethernet adapter Ethernet:

   Connection-specific DNS Suffix  . :
   Description . . . . . . . . . . . : Intel(R) PRO/1000 MT Desktop Adapter
   Physical Address. . . . . . . . . : 08-00-27-D9-84-45
   DHCP Enabled. . . . . . . . . . . : No
   Autoconfiguration Enabled . . . . : Yes
   IPv6 Address. . . . . . . . . . . : 2a02:2f0e:d519:700:6988:db58:a642:4bb4(Preferred)
   Link-local IPv6 Address . . . . . : fe80::6988:db58:a642:4bb4%12(Preferred)
   IPv4 Address. . . . . . . . . . . : 192.168.1.200(Preferred)
   Subnet Mask . . . . . . . . . . . : 255.255.255.0
   Default Gateway . . . . . . . . . : fe80::1000%12
                                       192.168.1.1
   DHCPv6 IAID . . . . . . . . . . . : 302514215
   DHCPv6 Client DUID. . . . . . . . : 00-01-00-01-2F-3F-56-67-08-00-27-D9-84-45
   DNS Servers . . . . . . . . . . . : ::1
                                       127.0.0.1
   NetBIOS over Tcpip. . . . . . . . : Enabled

Tunnel adapter isatap.{DEBE0615-87B2-4389-A3FC-785F6F6A9B6B}:

   Media State . . . . . . . . . . . : Media disconnected
   Connection-specific DNS Suffix  . :
   Description . . . . . . . . . . . : Microsoft ISATAP Adapter
   Physical Address. . . . . . . . . : 00-00-00-00-00-00-00-E0
   DHCP Enabled. . . . . . . . . . . : No
   Autoconfiguration Enabled . . . . : Yes
We can disable IPv6 for the VM’s network adapter; otherwise, it would use IPv6 for internet access. Simply remove it in the network adapter configuration to simplify the setup.
Make sure that DNS forwarding is configured, as shown below so that this server can interact with the internet.

or configure it using this PowerShell script
# Configure DNS Forwarders
Write-Host "Configuring DNS forwarders..." -ForegroundColor Green
$DNSServer = Get-DnsServer
$DNSServer.Forwarders | Remove-DnsServerForwarder -Force
Add-DnsServerForwarder -IPAddress "8.8.8.8","8.8.4.4" -PassThru
Now, on an Apple MacBook, we can install Microsoft Remote Desktop (formerly Windows App) to administer the Windows Server using the RDP protocol